


Tropaeolum nanum
Nasturtium Alaskan Green - microgreens seeds
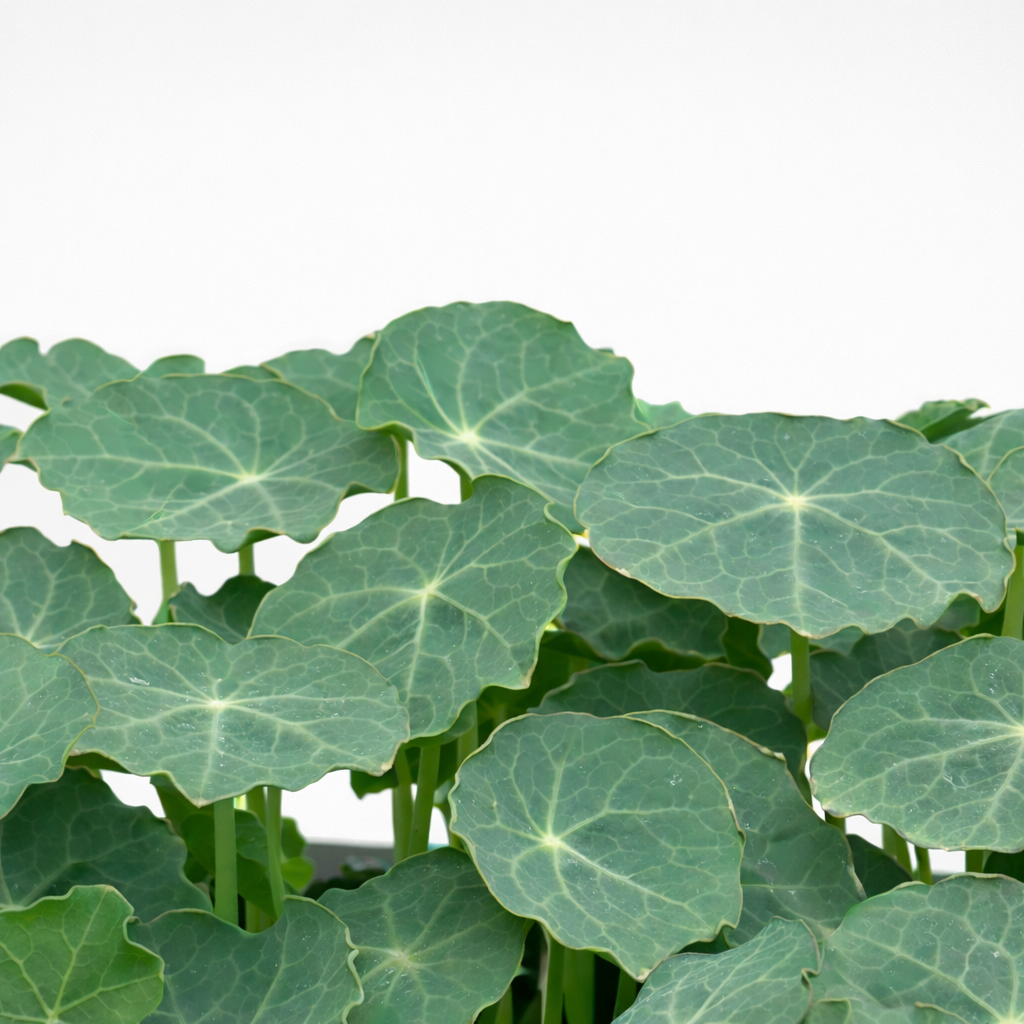
✨Peppery, crisp microgreen with succulent lily-pad leaves – a bold addition to salads and gourmet plates.
- Regular price
-
9,00 zł - Regular price
-
- Sale price
-
9,00 zł
Couldn't load pickup availability
The most dramatic microgreen in your tray — bold, peppery, and impossible to ignore.
100% satisfaction guarantee
Your satisfaction is our top priority.
If something's not right, we’ll make it right — whether that means replacing your item or giving you a full refund. No fuss, no hassle.
SHIPPING INFORMATION
Shipping cost is based on weight and destination. Just add products to your cart and use the Shipping Calculator to see the shipping price.

Details
The most dramatic microgreen in your tray — bold, peppery, and impossible to ignore.
FULL SPECIFICATION TABLE
General Specification
| Common Name | Green Nasturtium microgreens |
| Botanical Name | Tropaeolum majus nanum |
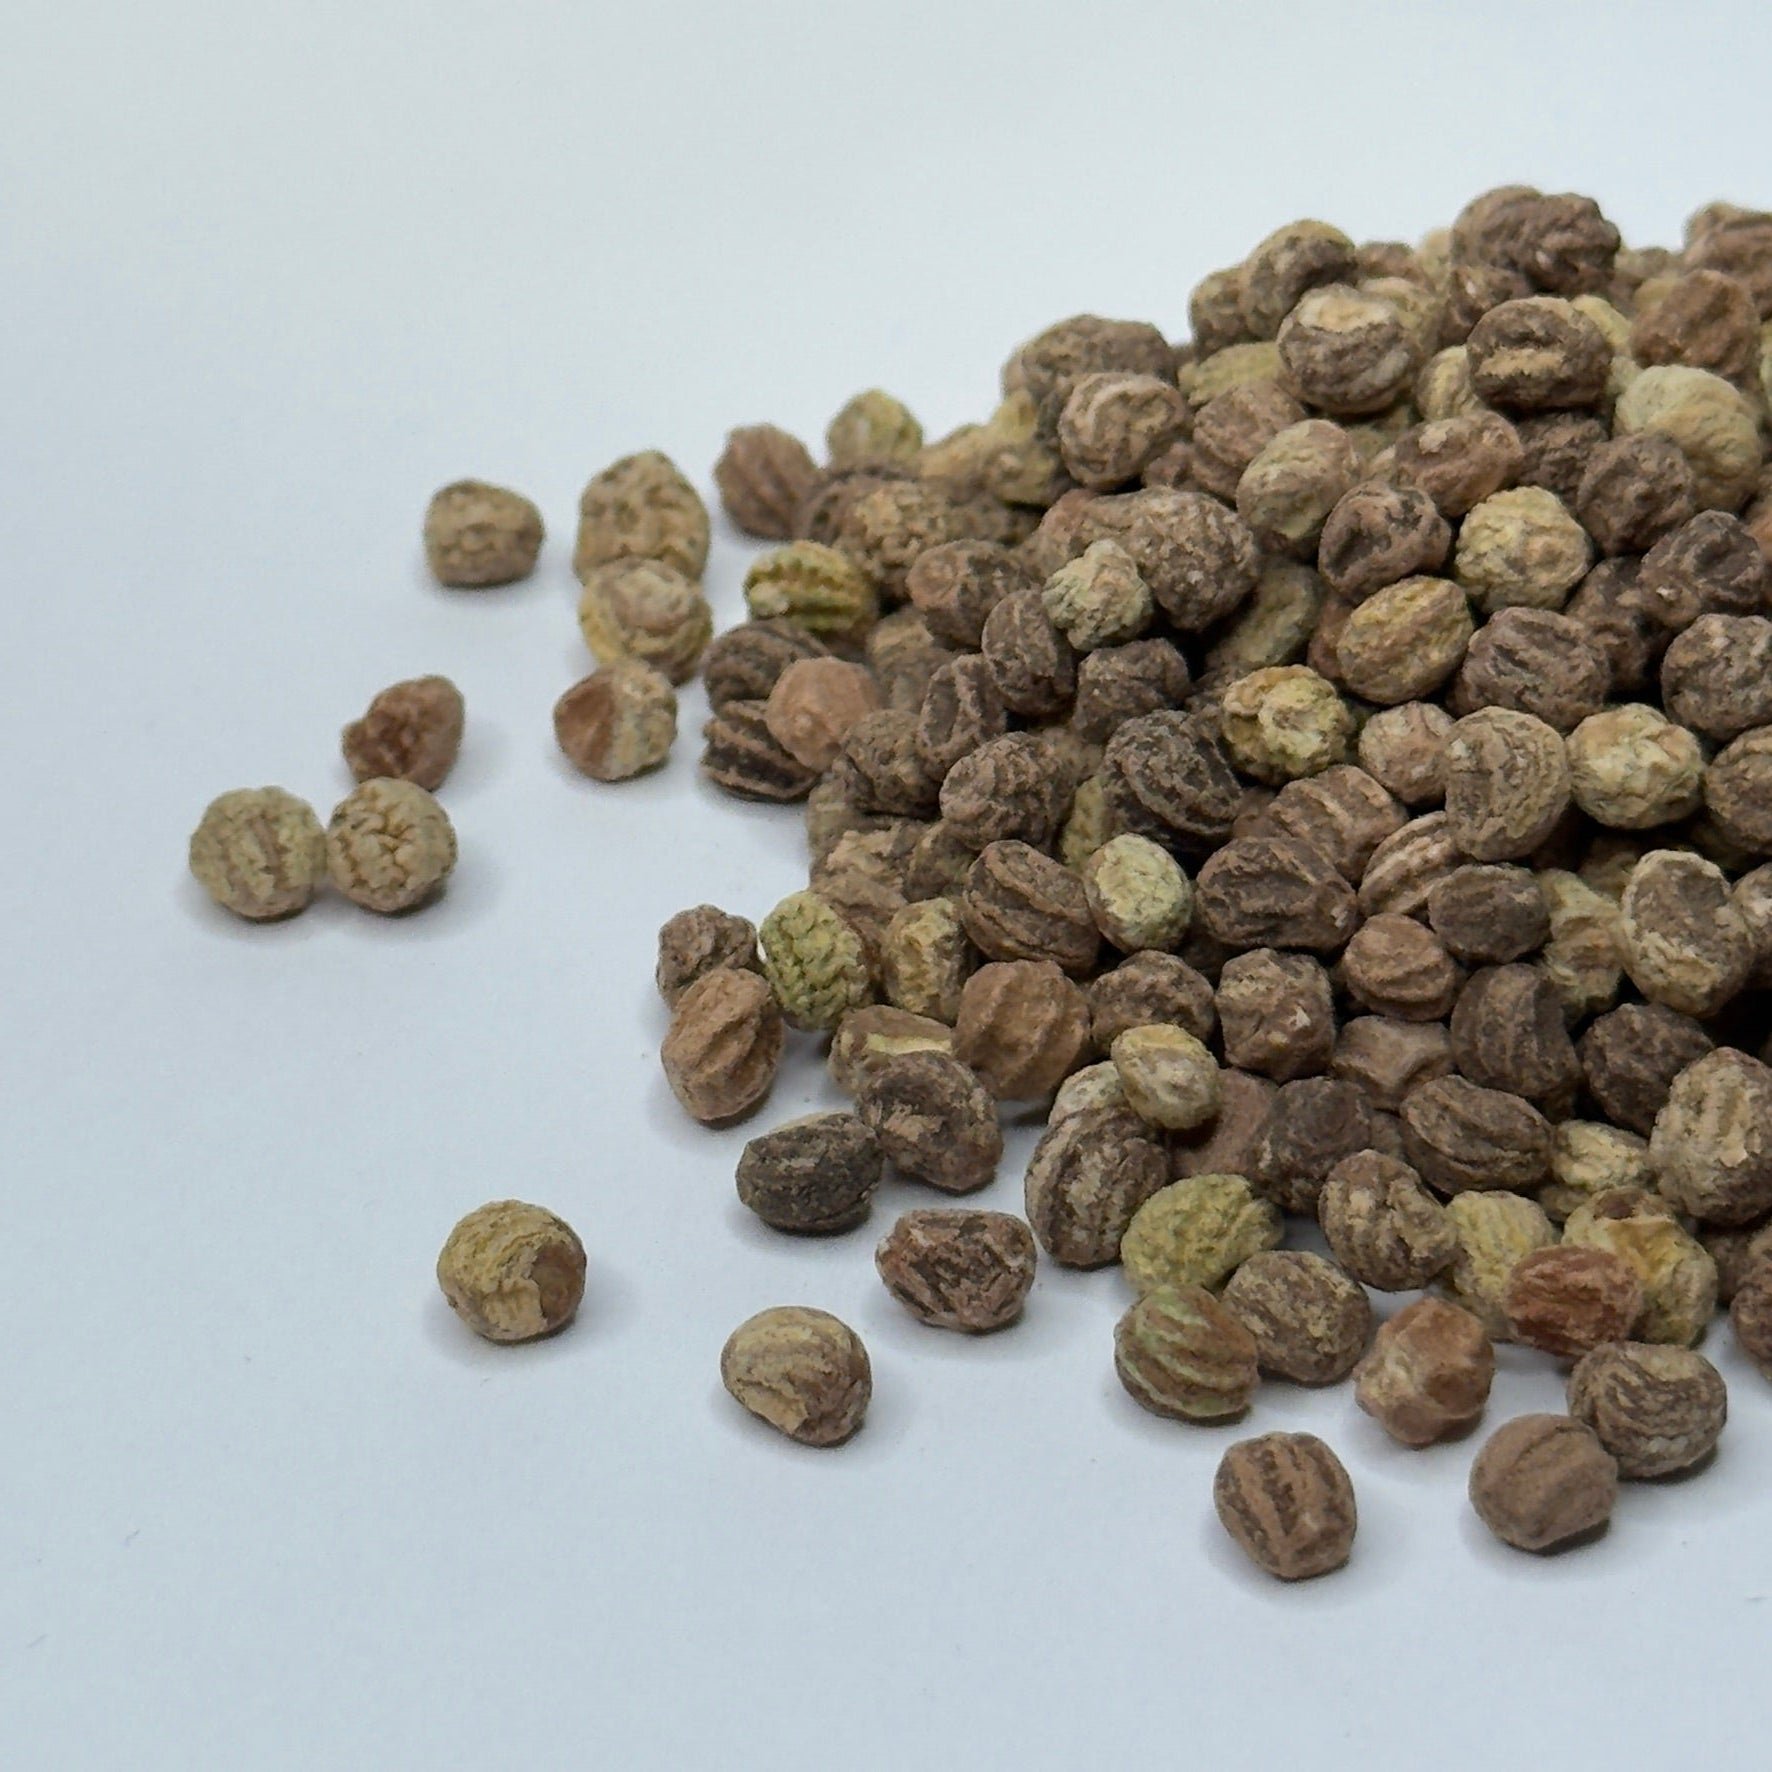
| Seed Type | Conventional, untreated, non-GMO |
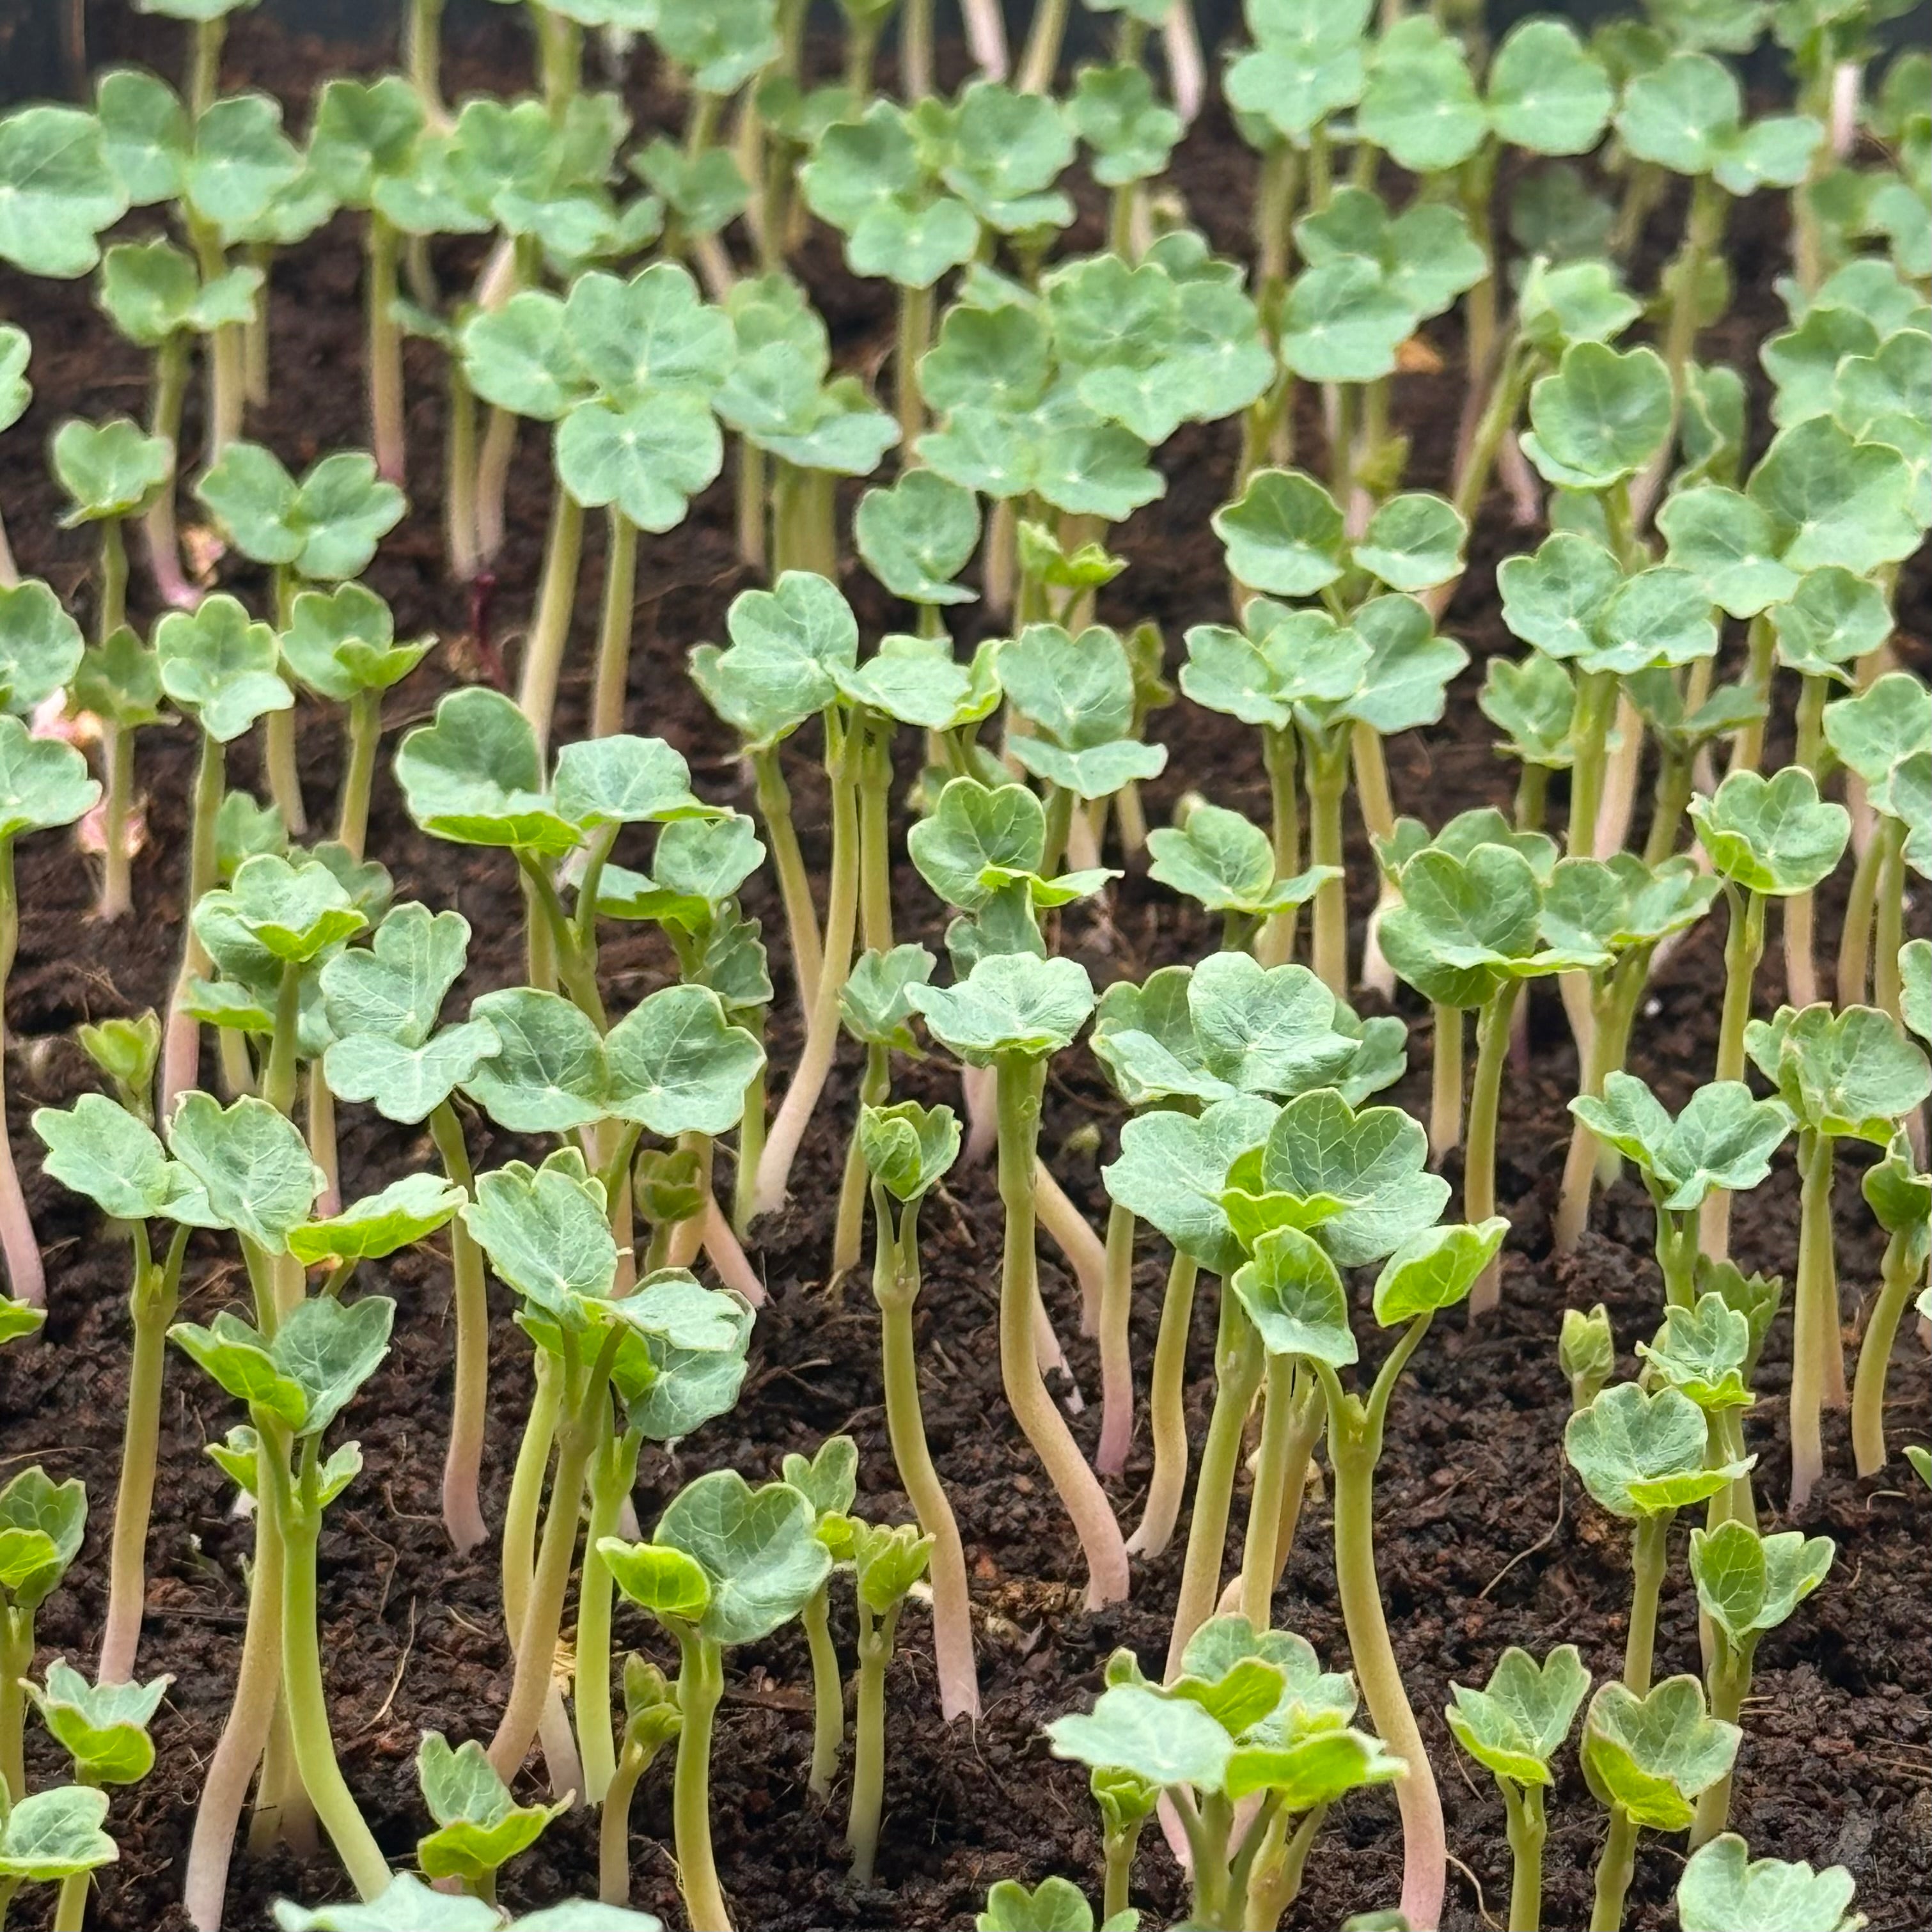
| Stem/Leaf Color | Thick stems, pink to pale green; large, round, shield-shaped pale to mid-green leaves |
| Flavor & Texture | Bold, sharp, persistently peppery heat; juicy and succulent stems; broader and more tenacious than radish or arugula |
| Seed Count per 10g | ~75–85 seeds (≈7.5–8.5/g) |
Cultivation Data
| Difficulty | Medium |
| Preferred Medium | Soil or quality potting compost; hydroponic mats not recommended — roots need support and moisture retention |
| Seeding Density (1020 tray) | ~70–80 g per 1020 tray (25×50 cm) |
| Seeding Density (10x10 cm) | ~5.5–6.5 g per 10×10 cm |
| Expected Yield | ≈150–200 g per 1020 tray at cotyledon/first true-leaf stage |
| Soaking | Yes: 2–6 hours in lukewarm water; rinse seeds after soaking |
| Blackout Days | 5–8 days (buried or weighted blackout preferred; germination is slow and uneven — this is normal) |
| Watering, pH & Temp | Bottom water; pH 6.0–6.5; 18–22 °C; ensure good airflow to prevent mould |
| Sprouting Time | 4–6 days after soak (uneven germination is normal for this variety) |
| Harvest Time | 14–21 days from seeding |
Health & Nutrition
ABOUT
Green Nasturtium microgreens are one of the few crops that look as impressive on the plate as they taste — those wide, shield-shaped leaves on flushed pink stems are a chef's garnish dream straight from the tray. Bite into one and you'll get a clean, sharp, persistent peppery heat that builds slowly on the palate, quite unlike any other microgreen — more tenacious than radish, more complex than arugula. Scatter a few chopped leaves over street tacos, fold them into a vinaigrette, or blend them into soft goat's cheese for an instant flavour upgrade. Nasturtiums also hold the record for the highest lutein concentration of any edible plant — reason enough to start a tray today.
GROWING INSTRUCTIONS
Why Choose Deliseeds?
-
Untreated & Non-GMO, Conventional or Organic Safe, high-germination seeds. We also offer wide selection of certified organic seeds.
-
Fast EU Shipping
Orders dispatched within 24h. Delivery times 1-5 working days.
-
100% Satisfaction Guarantee
If you're not satisfied - you'll get a replacement or a refund.
-
Expert Support
We mean it! You get our personnal support to help you succeed.